In this guideJump to a section
- A quick fit check
- Choose foods that fit dry storage
- Understand the jobs of the package
- Use oxygen absorbers only in an appropriate system
- A small-batch packaging workflow
- Select the storage location
- Inspect and rotate
- Plan the complete meal, not just the grain
- Common long-term storage errors
- Authoritative references to consult
- Your next step
Long-term food storage should deepen a pantry that already works for three days and two weeks. It should not replace safe water, no-cook meals, a manual can opener, or food people know how to prepare.
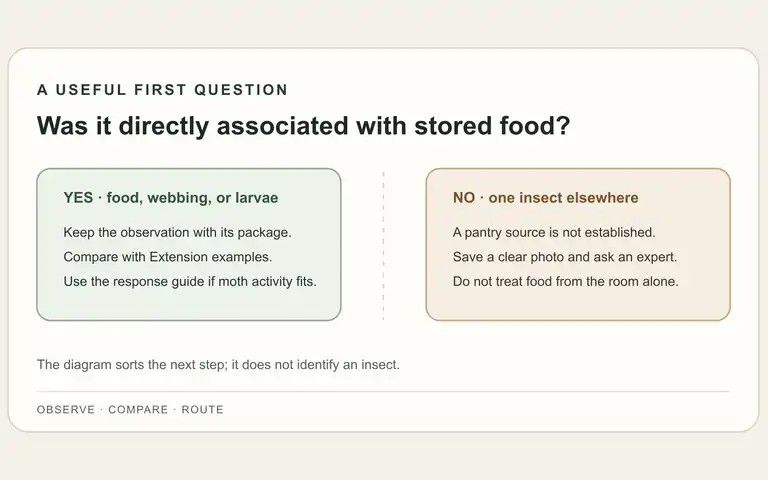
The illustration shows a planning sequence only; it does not establish that a package is food-safe or that a storage method extends shelf life.
Start with emergency food storage basics and the food storage calculator. Then identify the staples that appear repeatedly in your household menu. Bulk packaging makes sense only when you can store, cook, and rotate the food.
A quick fit check
Use this table to decide whether a food belongs in a deeper dry-storage experiment. It is a screening tool, not a shelf-life chart: the exact food, package, seal, storage conditions, and current source guidance still control.
| Food or condition | Starting decision | Check before packaging |
|---|---|---|
| A dry staple your household already eats | Candidate for one small batch | Confirm the food is sound and follow the exact food-contact, package, seal, and absorber instructions. |
| Brown rice, nuts, whole-grain flour, dried meat, home-dried produce, or powdered dairy | Do not carry over another food’s storage assumption | Use food-specific guidance and keep the product’s storage instructions; these foods behave differently from dry staples such as white rice or dry beans. |
| Moist, oily, or otherwise unsuitable food | Do not use an absorber to make it shelf stable | Choose a food-specific tested preservation method or a safer stored alternative. |
| Food with insects, moisture, an unusual odor, or damaged packaging | Do not package or taste it | Isolate the item and discard it when safety is uncertain. |
Choose foods that fit dry storage
Dry storage methods are generally intended for low-moisture foods. Common candidates can include polished rice, dry beans, rolled oats, pasta, and some whole grains, depending on the food, packaging system, and authoritative guidance you follow.
Foods with more oil or moisture behave differently. Brown rice, nuts, whole-grain flour, dried meat, home-dried produce, powdered dairy, and other products should not inherit a shelf-life claim from white rice or dry beans. Keep manufacturer packaging and storage instructions when they are more specific. For ordinary retail packages, the dry-rice storage guide distinguishes white and brown rice quality guidance, while the flour storage guide compares pantry and cold-storage choices.
Do not package a food for room-temperature storage merely because it feels dry.
For an ordinary opened box, the dry-pasta storage guide explains product dates, moisture and pest checks before pantry storage. Home-dried foods require a tested dehydration process and moisture control; see DIY emergency food preservation.
Understand the jobs of the package
A storage system may need to manage several hazards:
- Moisture: can damage texture, packaging, and safety.
- Oxygen: can degrade quality and support insects in some dry foods.
- Light: can accelerate quality loss.
- Pests: can enter weak seals or damaged packages.
- Odors and chemicals: can contaminate food or packaging.
- Heat: generally shortens useful storage life.
No single bucket, bag, or absorber solves every problem. The food-contact inner package protects the food and provides a barrier. A rigid outer container can add puncture and pest protection. The storage room controls temperature, moisture, sunlight, and chemical exposure.
Use materials sold and documented for food contact. Never use a container that previously held pesticides, fuel, cleaners, paint, or another toxic substance. Do not assume that any metallic-looking bag is a suitable oxygen and moisture barrier.
Use oxygen absorbers only in an appropriate system
Oxygen absorbers can be part of a validated dry-food packaging method, but they are not universal preservatives. They do not dry food, make a wet food safe, reverse spoilage, or replace a sound seal. Utah State University Extension warns that reduced-oxygen packaging can create a botulism risk when the product is moist.
Use them only when all of these conditions are met:
- the food is appropriate and sufficiently dry for the method
- the packaging is an oxygen-barrier food-contact material
- the absorber manufacturer provides instructions for the food volume and package
- the package can be sealed promptly and checked
- the finished batch is labeled and stored correctly
Do not invent an absorber size from a generic online chart. Headspace, food density, residual oxygen, bag size, and product specifications affect the system. Follow the current instructions from the absorber and packaging manufacturers or research-based extension guidance.
An oxygen-reduced environment can create hazards for moist foods. Do not use an absorber to compensate for incomplete drying or conditioning, or to make an oily or otherwise unsuitable food shelf stable. For home-dried foods, follow current food-specific drying, cooling, conditioning, and packaging guidance; the NCHFP’s packaging guidance for dried foods does not give blanket approval for adding an absorber. Use one only when research-based guidance for the exact food and the absorber and packaging instructions support that combination.
A small-batch packaging workflow
1. Start with a menu quantity
Calculate how much of the staple appears in the two-week emergency menu, then add only a manageable deeper layer. Record the cooking water, fuel, and complementary proteins or vegetables needed to turn it into meals.
2. Inspect the food
Package fresh, sound dry food from a traceable source. Do not repackage food that shows insects, moisture, an unusual odor, or damaged original packaging.
3. Select a useful package size
Several smaller packages are often easier to inspect and use than one very large package. Once a barrier bag is opened, its original protection changes. A useful package should fit the household’s normal cooking and rotation pattern.
4. Prepare a clean, dry workspace
Keep the food, hands, tools, and sealing surfaces dry. Stage labels and equipment before opening absorbers. Follow the bag, sealer, and absorber instructions rather than improvising temperatures or seal widths.
5. Seal and inspect
Make the seal exactly as the packaging manufacturer directs. Visually inspect the entire seal for food particles, wrinkles, channels, or incomplete areas. Do not rely on a bucket lid to compensate for a defective inner seal.
6. Label before storage
Include:
- food and variety
- ingredient and allergen information
- original brand or lot information when available
- packaged date
- preparation directions and water amount
- any absorber used
- a use-first or review date based on the source guidance you follow
Avoid printing an unsupported universal “30-year” date. Product quality depends on the food, its initial quality, package, seal, and storage conditions.
Select the storage location
Use a cool, dry, dark space away from household chemicals and pests. Avoid attics, unconditioned sheds, hot garages, damp crawl spaces, and any location vulnerable to flooding when a more stable indoor location is available.
Keep containers off bare concrete if moisture is a concern, leave enough clearance to inspect for leaks or pests, and avoid stacking beyond the container manufacturer’s limits. Split the supply only when each location remains safe, accessible, and documented.
Inspect and rotate
Schedule regular pantry checks. Look for:
- punctures, broken seals, or loose lids
- moisture, condensation, staining, or corrosion
- insects, droppings, webbing, or gnawing
- swelling or a change in package shape that is not explained by the packaging system
- missing labels or dates
Do not taste questionable food. Isolate a damaged package so it cannot contaminate other supplies and discard it when safety is uncertain.
Open one small package during ordinary conditions at planned intervals. Record cooking behavior, flavor, odor, and household acceptance. Quality checks help you revise the rotation schedule, but they do not validate an unsafe packaging method.
Plan the complete meal, not just the grain
A bucket of one staple is not a balanced emergency menu. For every stored dry food, identify:
- the meal it supports
- safe water needed for cooking
- cooking time and outdoor fuel requirement
- protein, fat, produce, and flavor components
- the people who can eat it
- how leftovers will be handled without refrigeration
If a staple requires long cooking, include quick-cooking and no-cook alternatives. The freeze-dried meal comparison guide can help assess compact specialty meals, while the off-grid cooking guide covers safe equipment planning.
Paid links — we may earn a commission. As an Amazon Associate I earn from qualifying purchases.
 Check price at Amazon
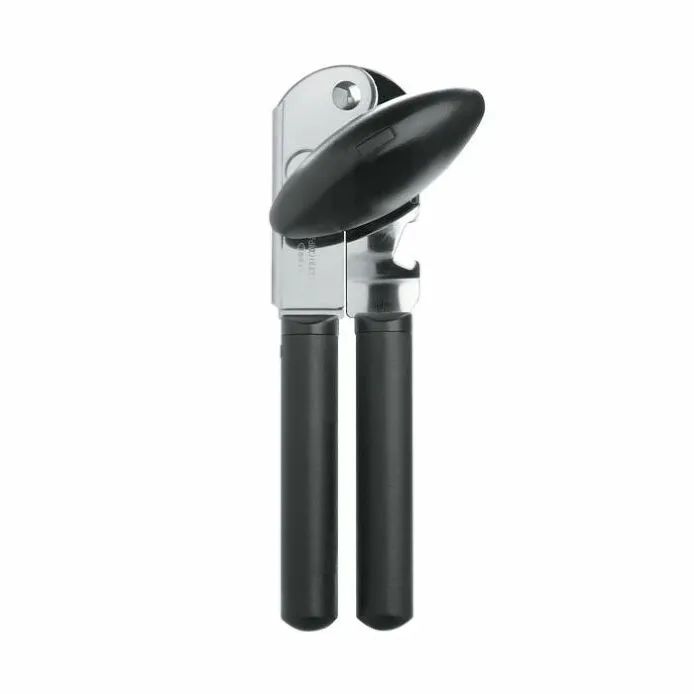
OXO Good Grips Soft-Handled Can Opener (SKU 28081)
A high-leverage manual can opener with cushioned non-slip grips ensures reliable access to canned proteins, vegetables, and complementary pantry staples when power outages disable electric kitchen appliances.
- Opening method
- Manual rotary can opener with large cushioned handles and an oversized turning knob.
- Listed dimensions
- 7 × 2 × 3 in
- Manufacturer care instructions
- Hand wash the can opener.
Source records checked on 2026-10-04. This is research, not hands-on testing. Manufacturer source.
Common long-term storage errors
- Repackaging food that the household never cooks.
- Copying a shelf-life number from a different food or package.
- Using absorbers with moist, oily, or otherwise unsuitable food.
- Leaving preparation directions and allergen information behind.
- Packing everything in one container that is too large to rotate.
- Counting calories without counting cooking water and fuel.
- Storing food near gasoline, pesticides, cleaners, or temperature extremes.
The durable approach is modest: choose one familiar dry staple, verify an appropriate packaging method, make a small labeled batch, store it well, and use it in normal meals before scaling.
Authoritative references to consult
- Utah State University Extension: 7 Factors That Prolong Your Food Storage Supply
- National Center for Home Food Preservation: Packaging and Storing Dried Foods
- Current food, food-contact packaging, sealer, and oxygen-absorber manufacturer instructions for the exact products in use.
Your next step
Package one small batch of a familiar, research-supported dry staple, label the food and method, and cook it during ordinary conditions before scaling the system.
If webbing, larvae or moths appear around stored food, follow the pantry-moth source inspection before repacking. Packaging alone will not remove an active infested source.